Easy paper hydrangeas
Posted by Abigail Cain on Feb 10th 2017

DIY Paper Flower Hydrangeas
Creating paper hydrangeas was one of my biggest challenges to figure out because I needed them to look authentic, but also keep the design simple enough that it didn't take forever to make one stem.
I first came up with this multi stem method here in the below video, which is still a good option! But then I had a creative epiphany one day that simplified it even more!
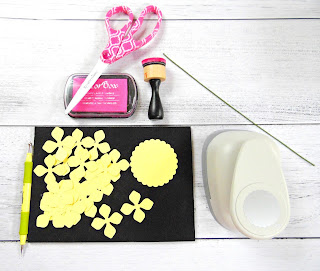
First let go over the supplies:
65lb car stock
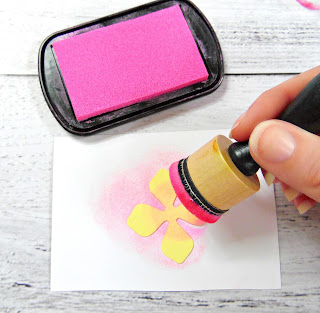
pigment ink and stamper
18 gauge wire
3-5 inch circle punch
glue gun and sticks
scissors
Cut out all your hydrangea petals. I recommend a cutting machine for this project because of the detailed nature but the templates do come with an outline PDF if you feel like hand cutting.
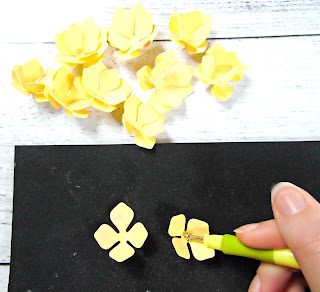
Using your rolling tool and mat, roll the center so the petals stand up.
Layer 2 petals together as shown.
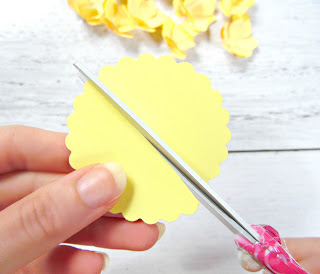
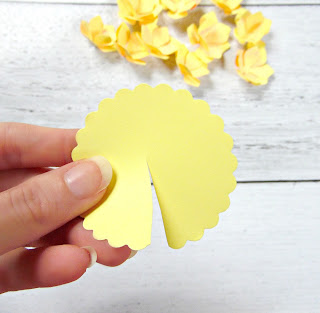
Next, punch out a circle. I'm using a 3 inch circle here.
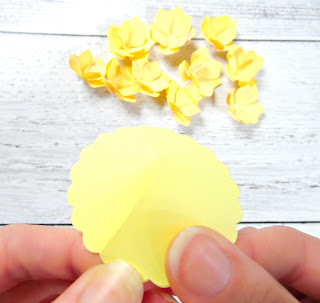
Cut a slit half way through the circle with your scissors.
Overlap and glue. The circle will now look 3D and appear as a dome shape.
Starting in the middle glue all your hydrangea pieces on until the whole dome circle is tightly covered.
It should look like this when finished. If you want to make bigger bunches then just punch out a bigger circle and cover it with hydrangea pieces.
Grab your 18 gauge wire and bend a a 90 degree angle 2 inches from the top. Curl into a circle.
Add glue to the wire circle and press firmly underneath your hydrangea bunch for a few seconds.
Make a few or a lot and enjoy you hydrangea paper flowers!
Visit my blog Mama's Gone Crafty and collect a free flower template when you subscribe


